Articles about maps
History of cartography
All about topographic maps
Topographic maps and traveling
Two centuries of Russian Cartography
Navigation software and offline maps
Navigation software and offline maps
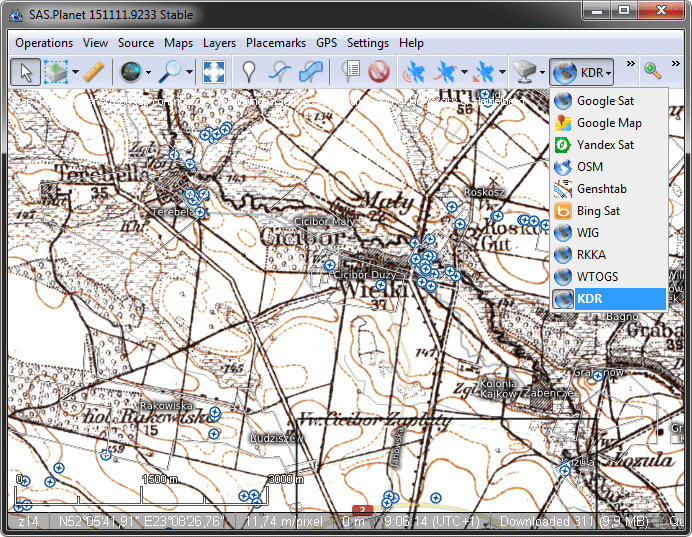
Create seamless multi-level maps based on sets of topographic maps for SAS.Planet
Organize interaction between PC and smartphone/tablet when preparing offline maps
Organize interaction between PC, smartphone/tablet and GPS while preparing tracks
Track plotting and storage in SAS.Planet
Create seamless multi-level maps based on sets of topographic maps for SAS.Planet
Unzip a set of topographic maps in a new folder
Seam and export maps in GlobalMapper
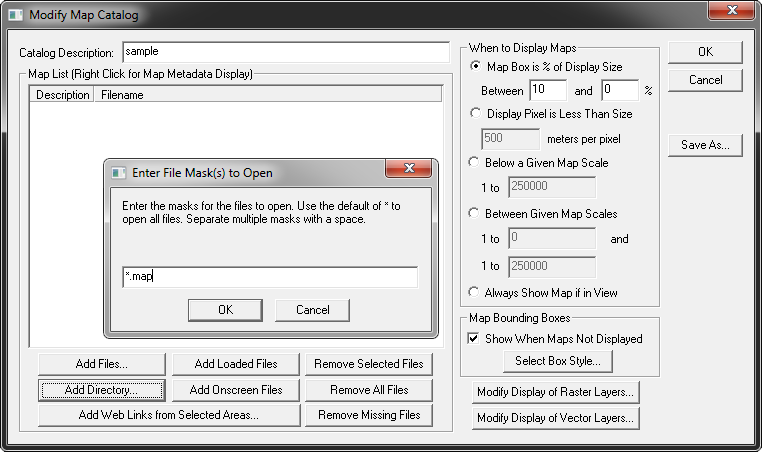
Create a new directory and add maps to it:
- In the main menu, select File> Create new map catalog
- Go to the folder with zipped maps and there create a directory sample.gmc
- In the appeared window, click on Add Directory ...
- The program by default will store created directory in the same folder as the maps. Click OK
- Specify the file mask *.map for program to select only georeferenced files, not the images, and click OK
- The program asks whether to process enclosed folders - answer No
- If everything was specified properly, the program will report on the number of the maps added. Click OK.
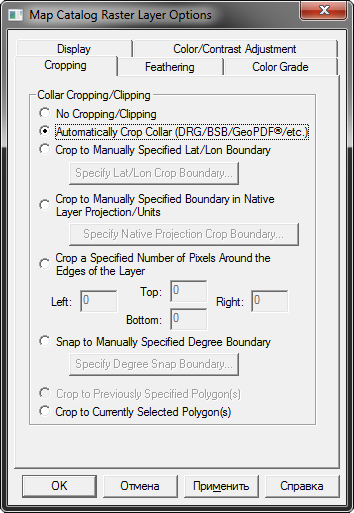
Specify settings for cutting sheets at the edges:
- In the lower right corner of the window with directory map settings, click on Modify Display of Raster Layers ...
- Select the tab Cropping
- Select the option of cutting Automatically Crop Collar and click OK
- Close the window of directory map settings by clicking OK
- On the screen appears a grid from added maps
- If when you zoom the grid (e.g. using the mouse wheel) on the boundaries of maps appear breaks - it is a program error. To eliminate it, you need to close GlobalMapper, having saved sample.gmw project settings, and open it again. This error occurs in version 16.0.
Export of a seamless maps in Web format
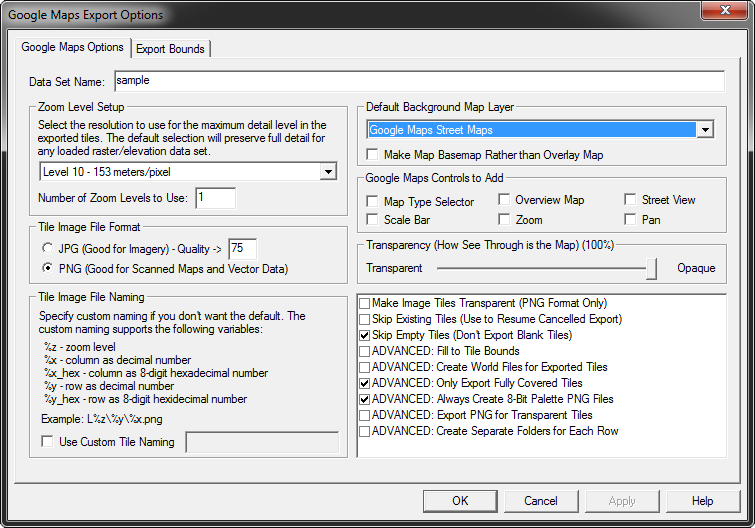
- In the main menu, select File> Export> Export Wb Format ...
- In the drop-down list of options leave the default option Google Maps Tiles
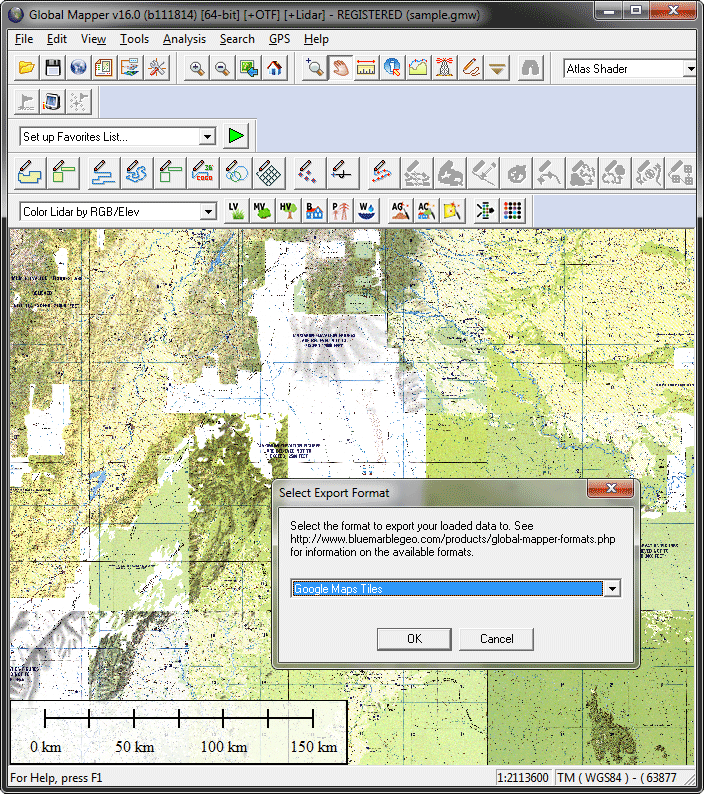
- In the appeared window in the block Zoom Level Setup specify the scale. If you are unsure of the correct value - it is better to export the samples with low values of the Level. In Number of Zoom Levels to Use indicate 1.
- Select the tile format in Tile Image File Format. In most cases, png format is the most relevant.
- You can also select the settings of transparency and additional export options if needed.
- Click OK, specify sample.html and click Save. You will see the export dialog, it can take considerable time depending on the number of maps.
- Immediately after the export go to the folder with maps and in a subfolder on the name selected when exporting Zoom Level open any of created images to check the scale. If necessary the export process can be interrupted and performed with different settings.
- For the subsequent creation of the substrate in SAS.Planet we need only folder with tiles. The rest of the files (html, gmc, gmw, xml) – are not needed.
Crerate multi-layer maps
- When exporting different scales of the original map with different settings of Zoom Level we get the number of folders with tiles, which will be our multi-layer map
- If necessary, one and the same original scale can be exported with different settings of Zoom Level to create intermediate or general layers
- Approximate correspondence of the scale of the original with the Zoom Level values is the following:
- 1: 500 000 (500k) - Z10-Z11
- 1: 200 000 (200k) - Z12
- 1: 100 000 (100k) - Z13
- 1:50 000 (050k) - Z14
Create multi-layer map for SAS.Planet
Create space to store tiles of the maps
- In the program’s directory (where it was unpacked at installation) create a folder cache_gmt (or go into it, if it exists)
- Here create a folder with a name of our future map, e.g. sample
- Transfer in it folders with tiles created in GlobalMapper (Z11, Z12, etc.).
Create a folder with map settings for SAS.Planet
- In the program’s catalog go to the folder Maps and then in its subfolder sas.maps. Here, the program stores file descriptions of all of the maps of the program (by the way is very convenient to remove all the maps you don’t use not to overload the menu of the program)
- Create here folder Custom (or any desired). Here will be stored all created maps
- Here create a folder for the map with the name sample.zmp
- Copy in it the content of any other standart map, e.g. from \ Maps \ sas.maps \ Google \ GoogleMap.zmp
- Next we need to edit the file params.txt, for this open it in a text editor. Description of the format is available here
- We need to change:
pnum - serial map number in the menu
GUID - you can simply change the last digit to the other, or generate a unique ID http://www.guidgen.com/
name (name_ru) - the name of our map
ParentSubMenu - menu name
NameInCache - must match the name of the directory with tiles in the folder cache_gmt, e.g. sample
Ext - specify the format selected for export
UseDwn = 0 - indicate to ban download from the web
CacheType = 4 - add a line that defines the format of our tiles, created in GlobalMapper
If everything done correctly, when you run SAS.Planet the map will appear in the menu, and it can be activated.